2016年8月24日星期三

忘记Google APP(谷歌企业邮箱、日历等)账号密码解决方案

Google的APP的确不错,特别是他们的免费的企业邮局,及谷歌企业邮箱,非常的好用。

我每个域名差不多都已经申请了他们的企业邮局。但是往往企业邮局多了,又闲置了,不经常使用,长期的忘记密码,更郁闷的是经常会忘记管理员帐户,我每个信箱的管理员帐户差不多都不一样,然后你选择忘记密码提示,直接显示与域名管理员联系,无法取回密码。这个时候怎么办?

其实很简单,大家用这个链接:

https://www.google.com/a/cpanel/your_domain.com/VerifyAdminAccountPasswordReset

把 your domain.com 换成你自己的域名。

google-app忘记账号密码

然后重新再做一次CNAME的指向,48小时内就会取得你的管理员用户名以及密码了。

2016年5月22日星期日

How to Batch Convert DOC files to PDF format Using Mac OSX Automator

Article No. 8 View the 37 Comments
Category: Power Tools May 25, 2010 How to Batch Convert DOC files to PDF format Using Mac OSX Automator
Our clients often request an area on their website for sharing business and promotional documentation. They also sometimes require that this content be available to the public via downloads. This request is often followed up by an email containing a zip archive of any number of .doc formatted files, with something like “Please convert these files to .pdf format for the website” in the subject.

Of course there are many methods and utilities in the wild for performing this type of file format conversion, however we were looking for a method that would batch process the files most efficiently, preferably without downloading or buying any additional software.

Below is a simple step by step solution for converting the format of doc files using Automator for Mac OSX. You can download the workflow at the end of this article.

Open Automator.
Create a new custom workflow.


From the Actions panel library, select Files & Folders then double-click Get Specified Finder Items.


Add the items you wish to convert.


Next, from the library, select Documents, then double click Convert Format of Word Documents.


From the dropdown menu, select the format you wish to convert the files to. In our case we select Portable Document Format (PDF)


Now we are ready to run the action. Click the run button in the top right of the automator window.


The new converted files are converted and saved using the original file name and file location.


Open up your destination folder and verify your files have been successfully converted.
This method for file conversion is not limited to converting .doc files to .pdf but can be modified to work with most file formats. Furthermore the Autormator application can be used to create more complex workflows where files can be moved, renamed, sorted etc.

In addition to providing a simple method for performing basic automation, after getting to know the Automator interface and discovering all its capabilities, you will find that it is perhaps one of the most useful but overlooked utility applications available for the mac OSX.

The best part: we achieved our goal to batch convert the files efficiently, we utilized a tool that we already have access to use, and by using this method we can build more complex workflows, and save and reuse them the next time we get the same request from a client.

Download the sample workflow:
Automator File Conversion Workflow

http://aseriesoftubes.com/articles/how-to-batch-convert-doc-files-to-pdf-format-using-mac-osx-automator/

2016年3月30日星期三

忘记Google APP(谷歌企业邮箱、日历等)账号密码解决方案

Google的APP的确不错,特别是他们的免费的企业邮局,及谷歌企业邮箱,非常的好用。

我每个域名差不多都已经申请了他们的企业邮局。但是往往企业邮局多了,又闲置了,不经常使用,长期的忘记密码,更郁闷的是经常会忘记管理员帐户,我每个信箱的管理员帐户差不多都不一样,然后你选择忘记密码提示,直接显示与域名管理员联系,无法取回密码。这个时候怎么办?

其实很简单,大家用这个链接:

https://www.google.com/a/cpanel/your_domain.com/VerifyAdminAccountPasswordReset

把 your domain.com 换成你自己的域名。

google-app忘记账号密码

然后重新再做一次CNAME的指向,48小时内就会取得你的管理员用户名以及密码了。

相关原文如下:

To reset the password for the administrator account, please visit your control panel login page and click ‘I cannot access my account.’ The detailed instructions are at http://www.google.com/support/a/bin/answer.py?answer=33561

You can also reset your password with the secondary email address associated with your Google Apps account. If you don’t have access to the secondary email address on file, and you’re using the Next generation version of the control panel, you can also reset your password by verifying domain ownership with a HTML file or a CNAME record by going to https://www.google.com/a/cpanel/your_domain.com/VerifyAdminAccountPasswordReset. Please replace your_domain.com with your domain name.

To access your control panel for your Google Apps Account, please log in via https://www.google.com/a/your_domain.com. Note: Your extension may vary (eg.: .com, .net, .org). The login page for email accounts is available via http://mail.google.com/a/your_domain.com.

If you haven’t created an administrator account yet, please be sure to log in to Google Apps with the email address you used when you initially signed up and create an admin account. If you find that another email address is pre-selected on the login page, click ‘Sign in as a different user’ to enter the email address you initially provided.

Google apps api 更换主域名 备份

SWAPPING YOUR GOOGLE APPS PRIMARY DOMAIN TO YOUR SECONDARY DOMAIN (FOR DUMMIES)
9 OCTOBER, 2015 JEN 238 COMMENTS


I know, I know, most of you are reading this and thinking, WTF? WTveryF are you talking about now? And that’s fair, this is a little out there, even for me. But I’ve just spent the better part of today trying to change the domain of my free Google Apps account, and now that I’ve made it happen, I feel I should share.

I am one of those lucky few who signed up for a free Google Apps account way back when there was such a thing, but somewhere along the line my domain changed. There’s a type A coder in my head, and she’s mostly ridiculed and pushed around by the rest of the gals upstairs, but she really likes things to be nice and orderly, so today she’s had a go at being in charge.

If I haven’t lost you yet, it may be because you CARE about the outcome! Perhaps you chanced upon my blog in a desperate attempt to change your OWN primary domain! Well then, my friend, I shall get right to it! And I’m going to make it SUPER easy:

* A note! As commentator have kindly pointed out, this method only allows you to have ONE DOMAIN and keep your free account. You can have a bunch of aliases too, but ONLY ONE DOMAIN. Sorry, those are the Googley Rules for free accounts now.

Legacy Google Apps Users:

If you’re lucky enough to have a FREE FREE FREE account, you need to upgrade to the free 30 day enterprise trial. Don’t forget to downgrade before the 30 days are up, or you’ll lose your FREE FREE FREE account!!!
You can upgrade from the Admin page of your Google Apps account. Seriously, let me help you, log in here: https://www.google.com/work/apps/business/
Adding a Secondary Domain:

Righto, so you’ve upgraded to a paid account (free for 30 days) – if you have a paid account, you’re already on track. Go back to the admin console, and click on ‘Domains’. If you can’t see ‘Domains’, click on ‘more controls’ at the bottom of the page. Okay, fine, just click here: https://admin.google.com/AdminHome?fral=1#Domains:
Click on the add a domain or alias button, and then add another domain. Don’t add an alias, okay, if you were happy with an alias you wouldn’t have searched out this post.
Follow Google’s verification steps.
Swapping your Primary and Secondary Domains:

Go here: https://developers.google.com/admin-sdk/directory/v1/reference/customers/update
You’re in customer update now, click on Try It Now (it’s in blue).
Make sure you’re logged into your relevant Google account (you should see your mail address in the top right corner).
Next to customerKey type: my_customer
Next to fields type: customerDomain
Click next to ‘Request Body’, and in the –add a property– drop-down that appears, choose: customerDomain
The following will magically appear: “customerDomain”:
Type your secondary domain in the box next to “customerDomain”: (leave out the www. bit, just type in yourdomainname.com)
Click Authorise and Execute
Your secondary domain is now your primary domain!
Legacy Users

Downgrade your account if you don’t want to lose your FREE FREE FREE account!!!
You need to remove your secondary domain (what used to be your primary domain) first. Go here to delete it: https://admin.google.com/AdminHome?fral=1#Domains:
Once you’ve deleted your secondary domain, click on billing in the Admin console, and in the drop-down next to Google Apps for Work, click cancel subscription.
Choose the downgrade account option.
Submit.
That is all.

Ja, I know, that was a lot. But a lot less than the four hours I’ve spent figuring it out.

2016年3月16日星期三

把Boom卸载干净!强迫症患者的福音

即使在Boom里卸载了软件,在系统偏好设置里输入输出设备选项里仍有Boomdevice的选项。这对强迫症来说是不能接受的。
开个终端 一个命令搞定

sudo kextunload -b com.globaldelight.driver.Boom2Device

2016年3月14日星期一

在 OS X 上 避免 DNS 泄露

什么是DNS泄露
最近墙越来越高了,随着法西斯节和月饼的关系,不少梯子也被拆了。甚至几个梯子开发者也被🍵,所以说,除了“如何科学上网”这个问题之外,“如何安全上网”这个问题也变得越来越不可让人忽略。

不仅仅是为了你我都懂的用途,就是一般的使用电脑上网,我觉得这个问题也应当得到重视。你在网络上面的一言一行都被你的服务商、ISP事无巨细地记录着……这原本是好的目的——一旦歹徒在通过网络行凶,我们就能够快速将其抓获——不过,一旦这些信息落入了坏人之手,那将不堪设想。

一般我们会想,那些浏览记录什么的有什么重要的呢?只要我的账号密码安全就好了啊!事实上,正是这些信息,给了黑客可乘之机。你的这些材料,都将成为社会工程学的攻击素材。

那么DNS泄露又是什么呢?

使用浏览器上网,你输入的域名就要依靠DNS来翻译成IP地址——电脑可不懂什么是域名。所以,也许你访问的内容经过了https加密,但ISP一样可以记录你究竟访问了那些网站!

就算你使用了VPN等代理来访问网络,你的DNS仍然有可能是本地解析的,这将导致你的隐匿行踪变得毫无意义!——这就是个人隐私的头号威胁:DNS泄露。

目前来讲,当你使用VPN的时候,DNS应该是远程解析的,但有些提供商并不支持它;另外如果你使用socks代理,那么只有 5 才支持远程DNS解析

另外

你如果使用了pac,那你需要一份按照域名来选择代理的 pac 而不是IP。——因为它还是会先解析出IP再判断是否需要代理。
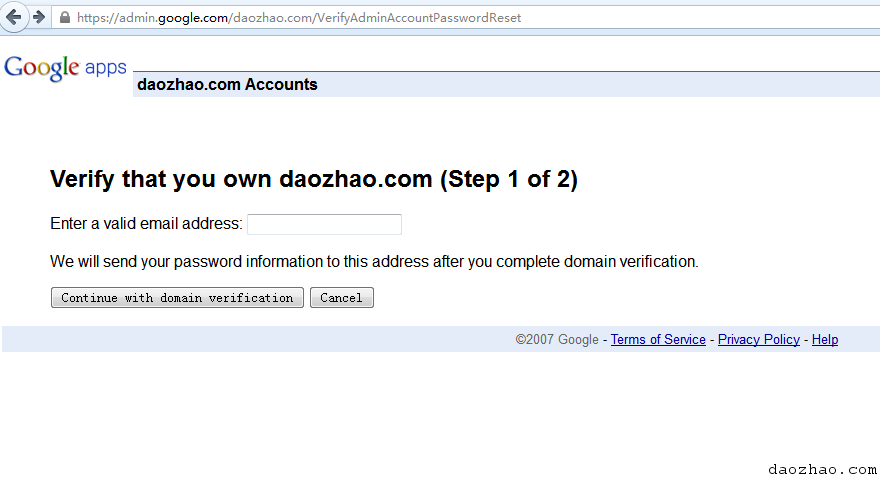
否则,你就可能泄露了DNS:

什么是DNS泄露
什么是DNS泄露
DNS透明转发

这时候就有人提出,如果使用VPN,为了避免DNS污染(其实也是泄露的一种),要使用第三方的公共DNS服务,比如谷歌的 8.8.8.8 ,但如果你的DNS泄露了,即使使用了公共DNS也无济于事:

DNS透明转发
DNS透明转发
你以为你访问到了第三方的公共DNS上,其实你还是访问了ISP的DNS服务器上。

关于DNS泄露的更多内容访问:https://dnsleaktest.com/what-is-a-dns-leak.html

要测试DNS泄露,访问:https://dnsleaktest.com
使用 dnscrypt 和 dnsmasq

dnscrypt 是 Open DNS 的一个项目,它允许你加密地访问DNS服务器,并解析域名。就好像使用https访问网站一样。而 dnsmasq 则是一个轻量级的DNS服务器,我们本地架设它来缓存DNS解析回复,这样就不用在同一时间里重复解析同一域名多次了——毕竟加密DNS解析不比明文解析快的。

注意

其实大多数 Linux 系统当中 dnsmasq 都是默认自带的——它并不臃肿,也不会耗费多少资源。
准备

为了安装 dnscrypt 和 dnsmasq ,你需要安装 Xcode ——我们需要用到Xcode 附带的一些命令行工具。

在安装了Xcode之后,使用命令来安装Homebrew:

1
ruby -e "$(curl -fsSL https://raw.githubusercontent.com/Homebrew/install/master/install)"
它是个类似 apt-get 或者 yum 的包管理器,安装它之后,你或许需要如下设置:

brew update 慢 解决办法 镜像更新源

安装 dnsmasq

使用 brew install dnsmasq 来安装它。

我们编辑它的配置:

1
2
3
mkdir -p /usr/local/etc
cp /usr/local/opt/dnsmasq/dnsmasq.conf.example /usr/local/etc/dnsmasq.conf
vim /usr/local/etc/dnsmasq.conf
比如说如下配置:

1
2
3
4
5
6
7
8
# Never forward plain names
domain-needed

# Never forward addresses in the non-routed address spaces
bogus-priv

# Forward queries to dnscrypt on localhost
server=127.0.0.1#5355
再写入一条额外的配置: echo "conf-dir=/usr/local/etc/dnsmasq.d" >> /usr/local/etc/dnsmasq.conf 来让配置目录生效以放入更多规则:

1
2
3
4
5
6
7
mkdir /usr/local/etc/dnsmasq.d
//创建配置目录

wget -4 --no-check-certificate -O /usr/local/etc/dnsmasq.d/accelerated-domains.china.conf https://raw.githubusercontent.com/felixonmars/dnsmasq-china-list/master/accelerated-domains.china.conf
//为国内常用网站取消DNS加密
对于国内比如淘宝京东这类网站,我想你不会去代理,那么也就没必要加密处理了,由于国内多用了cdn加速,我们有国外DNS解析的话会导致走到国外线路上,速度很慢。如果你需要加密,就跳过这一步即可👌。
设置启动:

1
2
3
sudo cp -fv /usr/local/opt/dnsmasq/*.plist /Library/LaunchDaemons
sudo chown root /Library/LaunchDaemons/homebrew.mxcl.dnsmasq.plist
sudo launchctl load /Library/LaunchDaemons/homebrew.mxcl.dnsmasq.plist
使用 sudo lsof -ni UDP:53 或者 ps -ef | grep '[d]nsmasq' 来验证dnsmasq已经启动。

dnsmasq 虽然被用作了DNS缓存,它一般也会用在微型服务器上比如OpenWRT上作为DHCP服务器。事实上它在这方面用的更多。不过不用担心,我们安装的dnsmasq默认不开启DHCP功能。
安装 dnscrypt

使用 brew install dnscrypt-proxy 来安装dnscrypt。

设置启动:

1
2
sudo cp -fv /usr/local/opt/dnscrypt-proxy/*.plist /Library/LaunchDaemons
sudo chown root /Library/LaunchDaemons/homebrew.mxcl.dnscrypt-proxy.plist
编辑配置文件,把本地监听地址改为 127.0.0.1:5355来配合dnsmasq:

1
sudo vi /Library/LaunchDaemons/homebrew.mxcl.dnscrypt-proxy.plist
在 <string>/usr/local/opt/dnscrypt-proxy/sbin/dnscrypt-proxy</string> 这行下面插入: <string>--local-address=127.0.0.1:5355</string> ,好避免和dnsmasq冲突并只允许dnsmasq访问到它:

1
2
3
4
5
6
7
8
9
10
11
12
13
14
15
16
17
18
19
20
21
22
23
<?xml version="1.0" encoding="UTF-8"?>
<!DOCTYPE plist PUBLIC "-/Apple/DTD PLIST 1.0/EN" "http:/www.apple.com/DTDs/PropertyList-1.0.dtd">
<plist version="1.0">
<dict>
<key>Label</key>
<string>homebrew.mxcl.dnscrypt-proxy</string>
<key>KeepAlive</key>
<true/>
<key>RunAtLoad</key>
<true/>
<key>ProgramArguments</key>
<array>
<string>/usr/local/opt/dnscrypt-proxy/sbin/dnscrypt-proxy</string>
<string>--local-address=127.0.0.1:5355</string>
<string>--ephemeral-keys</string>
<string>--resolvers-list=/usr/local/Cellar/dnscrypt-proxy/1.6.0/share/dnscrypt-proxy/dnscrypt-resolvers.csv</string>
<string>--resolver-name=dnscrypt.eu-dk</string>
<string>--user=nobody</string>
</array>
<key>UserName</key>
<string>root</string>
<key>StandardErrorPath</key>
//余下部分省略不写。
最后,使用 sudo launchctl load /Library/LaunchDaemons/homebrew.mxcl.dnscrypt-proxy.plist 启动服务。

使用 sudo lsof -ni UDP:5355 或者 ps -ef | grep '[d]nscrypt' 来验证服务已经生效。

dnscrypt 还有个对应的 dnscrypt-wrapper,它兼容dnscrypt-proxy的加密——也就是说你可以用它来搭建自己的dnscrypt服务器而不必使用公用dnscrypt服务器。——这用来抵御DNS污染~你可以参考页尾“延伸阅读”里的链接来了解更多。
配置网络

打开 偏好设置→网络→高级→DNS选项卡 ,只填入 127.0.0.1 并保存即可。

设置DNS
设置DNS
验证

使用dig来分别验证二者是否正常工作:

1
2
3
4
5
6
7
8
9
10
11
12
13
14
15
16
17
18
19
20
21
22
23
24
25
26
27
28
29
30
31
32
33
34
35
36
37
38
╰─➤ dig www.twitter.com @127.0.0.1 -p 5355

; <<>> DiG 9.8.3-P1 <<>> www.twitter.com @127.0.0.1 -p 5355
;; global options: +cmd
;; Got answer:
;; ->>HEADER<<- opcode: QUERY, status: NOERROR, id: 12542
;; flags: qr rd ra; QUERY: 1, ANSWER: 5, AUTHORITY: 4, ADDITIONAL: 5

;; OPT PSEUDOSECTION:
; EDNS: version: 0, flags:; udp: 4096
;; QUESTION SECTION:
;www.twitter.com. IN A

;; ANSWER SECTION:
www.twitter.com. 490 IN CNAME twitter.com.
twitter.com. 16 IN A 199.16.156.6
twitter.com. 16 IN A 199.16.156.102
twitter.com. 16 IN A 199.16.156.198
twitter.com. 16 IN A 199.16.156.230

;; AUTHORITY SECTION:
twitter.com. 112220 IN NS ns4.p34.dynect.net.
twitter.com. 112220 IN NS ns2.p34.dynect.net.
twitter.com. 112220 IN NS ns3.p34.dynect.net.
twitter.com. 112220 IN NS ns1.p34.dynect.net.

;; ADDITIONAL SECTION:
ns1.p34.dynect.net. 40536 IN A 208.78.70.34
ns2.p34.dynect.net. 40536 IN A 204.13.250.34
ns3.p34.dynect.net. 40536 IN A 208.78.71.34
ns4.p34.dynect.net. 40536 IN A 204.13.251.34

;; Query time: 423 msec
;; SERVER: 127.0.0.1#5355(127.0.0.1)
;; WHEN: Wed Sep 2 21:10:55 2015
;; MSG SIZE rcvd: 272

//你可能需要稍微等一会dnscrypt才能够建立连接。


1
2
3
4
5
6
7
8
9
10
11
12
13
14
15
16
17
18
19
20
21
22
23
24
25
26
27
28
29
30
31
32
33
34
35
36
37
38
39
40
41
42
43
44
45
46
47
48
49
50
51
52
53
54
55
56
57
58
59
60
61
─➤ dig www.google.com @127.0.0.1

; <<>> DiG 9.8.3-P1 <<>> www.google.com @127.0.0.1
;; global options: +cmd
;; Got answer:
;; ->>HEADER<<- opcode: QUERY, status: NOERROR, id: 6714
;; flags: qr rd ra; QUERY: 1, ANSWER: 5, AUTHORITY: 4, ADDITIONAL: 5

;; OPT PSEUDOSECTION:
; EDNS: version: 0, flags:; udp: 4096
;; QUESTION SECTION:
;www.google.com. IN A

;; ANSWER SECTION:
www.google.com. 297 IN A 173.194.112.116
www.google.com. 297 IN A 173.194.112.112
www.google.com. 297 IN A 173.194.112.113
www.google.com. 297 IN A 173.194.112.114
www.google.com. 297 IN A 173.194.112.115

;; AUTHORITY SECTION:
google.com. 112253 IN NS ns3.google.com.
google.com. 112253 IN NS ns2.google.com.
google.com. 112253 IN NS ns1.google.com.
google.com. 112253 IN NS ns4.google.com.

;; ADDITIONAL SECTION:
ns1.google.com. 300608 IN A 216.239.32.10
ns2.google.com. 300608 IN A 216.239.34.10
ns3.google.com. 300608 IN A 216.239.36.10
ns4.google.com. 300608 IN A 216.239.38.10

;; Query time: 519 msec
;; SERVER: 127.0.0.1#53(127.0.0.1)
;; WHEN: Wed Sep 2 21:10:22 2015
;; MSG SIZE rcvd: 259
//第一次查询略慢,因为要走dnscrypt。

╰─➤ dig www.google.com @127.0.0.1

; <<>> DiG 9.8.3-P1 <<>> www.google.com @127.0.0.1
;; global options: +cmd
;; Got answer:
;; ->>HEADER<<- opcode: QUERY, status: NOERROR, id: 64399
;; flags: qr rd ra; QUERY: 1, ANSWER: 5, AUTHORITY: 0, ADDITIONAL: 0

;; QUESTION SECTION:
;www.google.com. IN A

;; ANSWER SECTION:
www.google.com. 105 IN A 173.194.112.116
www.google.com. 105 IN A 173.194.112.115
www.google.com. 105 IN A 173.194.112.114
www.google.com. 105 IN A 173.194.112.113
www.google.com. 105 IN A 173.194.112.112

;; Query time: 0 msec
;; SERVER: 127.0.0.1#53(127.0.0.1)
;; WHEN: Wed Sep 2 21:13:34 2015
;; MSG SIZE rcvd: 112
//注意查询时间为0,以后的一段时间内,DNS就被缓存了:)
来自丹麦的dnscrypt服务器
来自丹麦的dnscrypt服务器
延伸阅读

编译安装 dnscrypt-wrapper 搭建防污染 DNS 服务器

dnsmasq (简体中文)

OS X 上的隐私安全指南


https://www.logcg.com/archives/1311.html

2016年3月13日星期日

在 Mac OS X 上通过 pdnsd 和 dnsmasq 加速 DNS 以及避免污染

无法查看这则摘要。请 点击此处查看博文。

Homebrew安装问题

设置Shadowsocks代理
参考链接

问题1:curl: (35) Server aborted the SSL handshake
创建文件 .curlrc
添加内容
socks5 = "127.0.0.1:1080"
问题2:停在==> Downloading and installing Homebrew...
创建文件 .gitconfig
添加内容
[http]
proxy = socks5://127.0.0.1:1080
问题3:卸载失败
运行命令,删除git文件夹,再重新安装

rm -rf /usr/local/.git
2015年10月03日发布

mac上编译安装libcurl

1、先到http://curl.haxx.se/ 上下载最新的curl源码
2、终端:进入解压后的curl目录
3、终端:./configure --prefix=/usr/local/curl (设置安装路径)
4、终端:make (编译)
5、终端:make install (安装)
6、最后会在/usr/local目录生成一个curl目录,说明安装成功。


注意:如果执行安装操作之后在指定目录没有生成curl文件夹,请检查一下你设置的目录是不是有权限限制,然后加上sudo命令(sudo make install)重新安装一遍。

2016年2月20日星期六

在Mac下安装Wordpress

我们可以在本机安装 wordpress,从而能在本地建站,折腾并调试。本文将详细介绍如何在Mac下安装wordpress。

1,首先按照前文在Mac下安装XAMPP所述,安装XAMPP;

2,为wordpress安装数据库。wordpress自身是不带数据库的,需要我们在XAMPP中创建数据库。在浏览器中输入:http://localhost/phpmyadmin/,进入数据库管理界面。输入数据库名:wordpress(可自定义),数据库格式选择:utf8_general_ci,链接校对选择:utf8_unicode_ci。然后点击创建。

3,下载wordpress(目前为3.3.1版本),然后解压 wordpress至:/Applications/XAMPP/xamppfiles/htdocs/ 下。

4,修改配置文件。拷贝 /Applications/XAMPP/xamppfiles/htdocs/wordpress/wp-config-sample.php 至 /Applications/XAMPP/xamppfiles/htdocs/wordpress/wp-config.php,然后用记事本打开,进行如下三处修改:
修改数据库名称database_name_here为你的数据库名,在本例中是wordpress
修改数据库用户名username_here为root
修改数据库密码为空,就是把password_here删除

5,在浏览器中输入:http://localhost/wordpress/,你应该可以看到如下设置页面!


恭喜,wordpress已经成功安装了!尽情定制折腾吧~~

http://blog.csdn.net/kesalin/article/details/7184387

mac下安装 xampp 无法启动apache

1.查看端口是否被占用
sudo lsof -i -n

2.用终端运行xampp,查看具体的错误
sudo su
/Applications/XAMPP/xamppfiles/xampp start

多半是这个问题:
XAMPP: Starting Apache...fail.
XAMPP: Another web server is already running.

解决办法:
sudo apachectl stop
// This command killed Apache server that was pre-installed on MAC OS X.

2016年1月27日星期三

每次看到大家对六小龄童这么深的感情,我都觉得自己不是中国人

每次看到大家对六小龄童这么深的感情,我都觉得自己不是中国人

哈哈

2016年1月5日星期二

Mac OS X Terminal 终端机常用语法教学

当今天无论是使用Windows还是MAC平台,遇到一些特殊状况时,还是得开启命令视窗/终端机,用打指令的方式,来进行设定或安装,而一般大家对于Windows下的DOS指令,或多或少都有些了认知,但换到MAC后,虽然开启的都是命令视窗,但当切在Windows下的指令,在MAC下完全没反应,且网路上也有人分享一些指令,但却完全不懂其中的意思,就拷贝执行,这样还蛮危险的,因此梅干就将MAC终端机常会使用到的指令与大家简单来分享一下,
路径指令:

ls:
ls就是list directory contents,显示该目录下的所有内容,就像Windows中的dir,而这一个ls后面也有相关的参数可用,可打man ls来查看,当看完再按Q键即可跳出。
梅問題-MAC終端機常用語法教學
cd:
cd就是change directory,变换当前的目录,而这个用法就与Windows下相同,cd空一格+资料夹名称。
梅問題-MAC終端機常用語法教學
cd(遇到空白):
当目录有空白或特殊符号([],!,$,&,*,;,|,\)时,得用\来将它格开。
梅問題-MAC終端機常用語法教學
cd(绝对~):
在路径的部分,除了可使用绝对外,也可用~,来表示当前的用户资料夹,就不用再打/User/XXX/。
梅問題-MAC終端機常用語法教學
pwd:
pwd就是print working directory,显示目前所在的目录结构。
梅問題-MAC終端機常用語法教學
资料夹指令:

mkdir:
mdir就是make diretory,就跟新增一个资料夹意思是一样的。
cp:
cp就是copy,这指令就像Ctrl+C複制的意思。
mv:
mv就是move,用来移动资料夹或档案,因此下回在网路上看到这指令要特别留一下。
rm:
rm就是remove,这指令要特别小心,用来删除资料的,当使用时要谨慎,否则删除就找不到了。
执行:

sudo:
sudo就是super user do,因此执行该指令时,需要使用电脑中的最高权限,也就是root帐户,所以当在执行时,会要求输入密码,以上这些是较常使用到的指令,因此还不熟悉的朋友,不妨也可花时间了解一下囉!


via:http://www.minwt.com/mac/14653.html

2016年1月4日星期一

熔断机制Circuit Breaker

熔断机制(Circuit Breaker),是指对某一合约在达到涨跌停板之前,设置一个熔断价格,使合约买卖报价在一段时间内只能在这一价格范围内交易的机制。
熔断机制正式发布的指数熔断机制作出了如下调整,即将触发5%暂停交易30分钟缩短至15分钟,相应地将14:30及之后触发5%暂停交易至收市,改为自14:45始;其他制度要点不变。[1] 
- via baike.baidu.com

2016年1月3日星期日

PortraitPro 这软件很强

Watch How Photo Editing Software Works

The World's Easiest Portrait Enhancement Software

Download the free trial

PortraitPro works in a completely different way to ordinary airbrushing and photo editing software.

The software is trained in human beauty, so you can add as much photo enhancement as required.

Expert photo touch-up can be achieved by unskilled users in minutes. With PortraitPro, you can enhance faces as much as you want simply by moving sliders.

- via www.portraitprofessional.com

2016年1月1日星期五

Blogo Mac版

 Blogo Mac版是Mac os平台上的一款非常时髦的Mac社交通讯软件,Blogo Mac版这款软件可以让你随时随地的编辑自己的博客,把身边发生的事情及时的发布到朋友圈还有社交群,让关注你的人时刻知道你的身边发生的事。

功能介绍
  【1】脱机模式
  Blogo离线模式允许你写,即使你没有连接到互联网。所有的内容你创建脱机时将被保存,所以你可以发布回来就在线。
  【2】图像编辑器
  获取视觉和图像添加到您的帖子很容易。更好的是,使用内置的编辑器来编辑。你可以调整和作物,将过滤器应用到他们。

  【3】实时预览
  Blogo巧妙地认识到你的主题和实时预览将始终显示如何你的帖子会三思发表它。
  【4】智能同步Evernote  
  从任何地方访问你的草稿。Blogo带给你用Evernote的完美融合,所以你可以很容易地管理,组织和检查你的想法和发布时间。
- via www.pc6.com